Friday, September 1, 2017

Carcase is finished

I finished painting the island and moved it into the kitchen some time ago.  I just hadn't gotten around to posting about it.  I also added the corbels which dressed it up a little bit.  It's still missing the towel bar on the end.  I have the walnut rod turned but still need to apply finish.


I have a temporary particle board top which I will cover with a plastic tablecloth so I can use the island as counter space until I build the walnut top.  I still haven't picked up material for the drawers or the top.  I'm taking a break to work on some fun small projects.  Yes, I have the attention span of a goldfish.


Sunday, July 30, 2017

Island painting

After a bit of sanding, I taped off the mortises and the tenons and sprayed primer and a first coat of paint on the all the parts that need to be painted.  Other than a bit of overspray, the under side and the interior of the cabinet won't be painted.


Parts drying while others wait to be painted.

Shiny
The wet paint in the photo above has some orange peel initially but will flow out and dry perfectly smooth.  I always reduce my oil-based paint with a bit of mineral spirits and add a cap full or so of Penetrol to help the paint flow out.  Before the glue up, I sanded all the parts lightly to prep them for the next coat of paint.

I didn't get any pics but I did the glue up in stages.  The ends of the cabinet had 10 mortise and tenon joints, five in each leg.  I added glue to the five in one leg then assembled with the other leg dry for clamping, constantly checking for square.  After the first glue was dry, I would glue up the other leg and clamp it again.  Everything was done in steps to try to avoid panic during glue up.  The only part that was a bit hectic was the vertical frame in the center with eight M&T joints and two sliding dovetails.  The dovetails got really tight once glue was added and I had to pound them home with some really heavy mallet blows.  For a minute, I didn't think I would get them in place.

All glued up.

I added holes in the panels for electrical outlets.
Paint stand
I built a stand to get the cabinet off of the ground for spraying.  I used an X configuration so I would be able to get the spray gun under the ends to spray the inside of the legs without any interference.  The stretchers are half-lapped in the center and mortised into the legs and held in place with a screw.

Leveled with outriggers added.
Knowing this arrangement would be top-heavy, I decided to add some outriggers to the bottom and shimmed under them so there was no play.  This made everything nice and stable.  I drilled a shallow 1/16" hole in the top of each leg.  I cut the head off of a finish nail then filed the tip extra sharp and dropped the blunt end into the hole leaving about 1/8" sticking up.  When we set the cabinet on top of the stand, I pressed the legs down onto these nails so the cabinet couldn't slip off of the stand.

On stand with a fresh coat of paint.
I sprayed a coat of paint today while the weather was in my favor.  If it passes inspection in the morning, it will be ready to move into the kitchen.  Otherwise, a light sanding and another coat of paint.  I'll be glad to get it out of the shop so I can move my workbench back to it's normal location.

Hopefully, I can pick up the lumber for the drawer boxes and drawer fronts this weekend and get it stickered in the shop to acclimate.

Tuesday, July 11, 2017

More Joinery

I continued cutting tenons for all of the mortises I did previously.  Additionally, I cut the dovetails for the upper web frame.  These seat into the top of each leg and into the upper rail on the short side of the carcase.

Dovetail tenons on the upper web frame.
Upper frame dovetailed into place.
Front of lower web frame.  Double mortise & tenon not fully seated.
This piece provided some excellent joinery practice.  There ended up being 48 mortise & tenon joints, 8 dovetail tenons, and two sliding dovetails.  There will probably be about 24 pocket screws added for good measure.

Sliding dovetail setup.
Thanks to treebangham's YouTube video on how he does sliding dovetails.  The flush-cut saw leaves an almost glassy finish on the walls of the dovetail socket.  I used some oil to keep the saw from binding in the cut.

Upper sliding dovetail.
I was able to get a respectable fit on the sliding dovetails.  I think they will go together about right when I add glue.


All interior framing in place.
 I used 1/2" Baltic birch plywood for the panels and rabbeted them on the table saw since the grooves in the frame were only 1/4".


With 1/2" Baltic birch panel (technically 12mm)
I used a router bit sized for 1/4" plywood to cut the grooves in the lower web frame to accept the bottom panels.  This plywood ended up being too thick to fit the grooves so I beveled the bottom slightly with a block plane to make it thinner around the edges.  Problem solved.

Bottom panels in place.

I still needed to figure out how to attach the brackets or corbels.  I ended up using lag screws with large diameter heads.  Poplar is fairly soft and I didn't want the heads to sink into the wood.

Spax screws.

Screws from inside the cabinet.

With corbels installed.
Now for lots of sanding.  This thing is too big for me to carry back and forth to my pop-up tent / paint booth, so I'll try to prime and paint as much as possible before final assembly.  Once it's assembled, I'll get someone to help me move it into the paint tent for the final coat of paint. 

To be continued ...

Tuesday, June 20, 2017

Milling and joinery

Still undecided on the size for the legs, I milled one leg to 2-1/2" square and laid it out with the rails and stiles to see if the the proportions looked OK.   I liked it so, I milled up the remaining leg stock to match.

Shavings and planer chips from milling the leg stock

I proceeded to do the layout for the joinery on one pair of legs and the mating rails and stiles.  Ended up having every marking and mortising gauge I own set to some dimension for the layout.
Harbor Freight, antique, and home made gauges

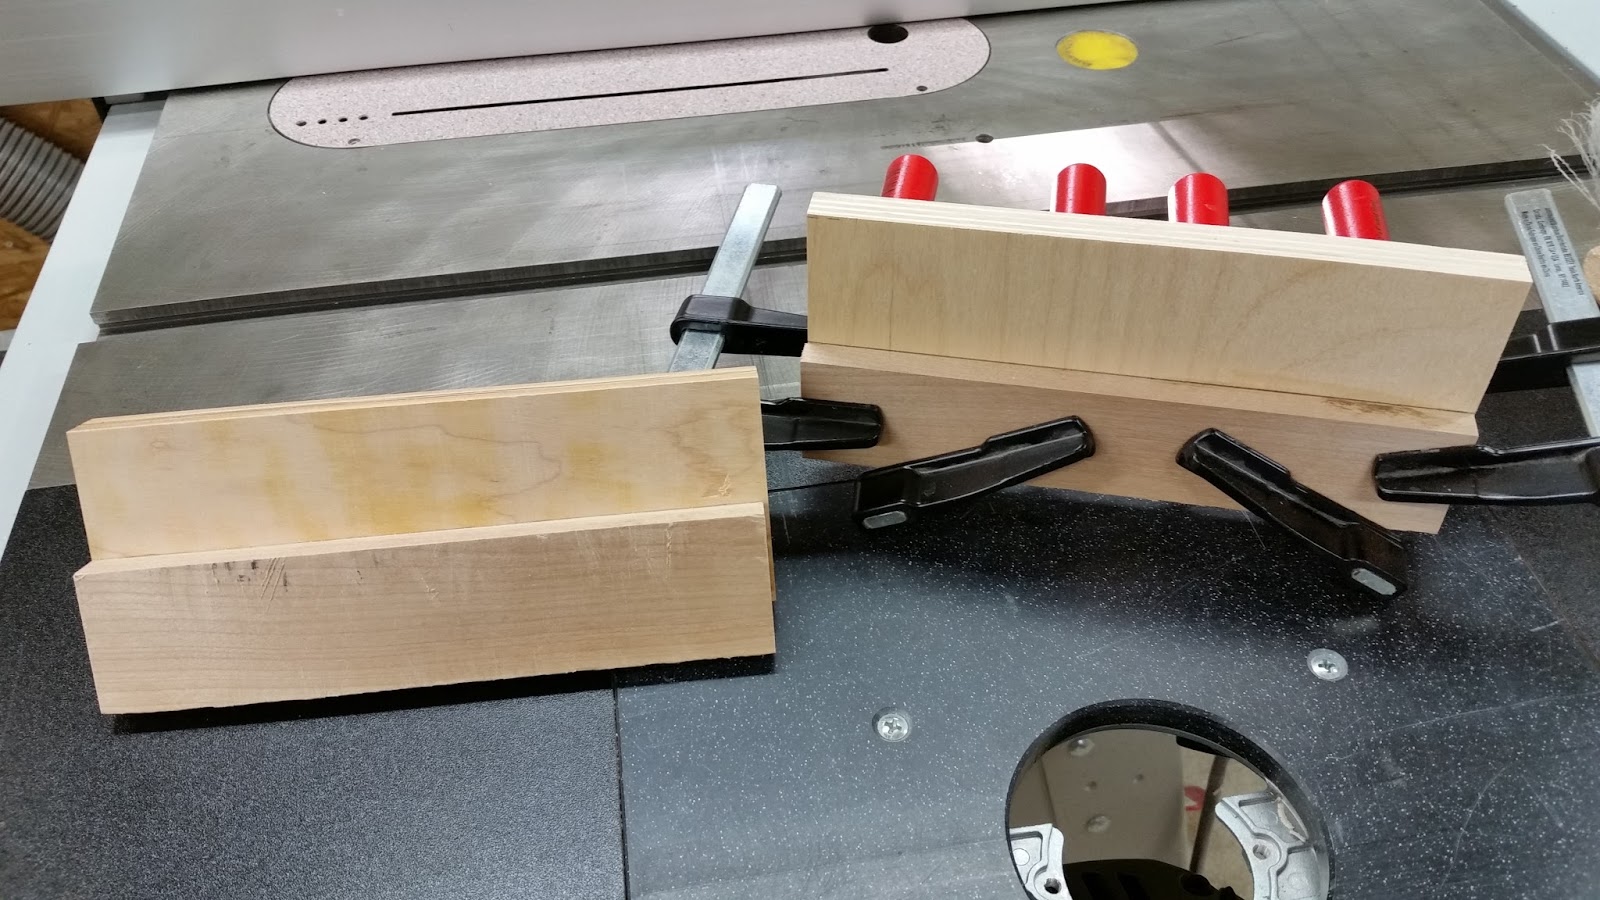
 I made a couple of fixtures to guide the chisel and keep the mortises parallel to the face of the work piece.  One is for a 3/8" offset and the other is 1/2".   I planed down a piece of birch and glued it to scraps of plywood.

Mortising guides


Guide in use
Clamping these to the work piece also helps support the weak side of the part when mortising near the edge.  I also discovered that I only needed to mark the length of each mortise since the guide determined one side of the mortise and the width of the chisel determined the other.  They work very well and make the work easy.

My Buck Brothers chisel from Home Depot turned out to be a pleasant surprise.  It held an edge as well as any of my other chisels.  The back was easy to flatten and it honed up quickly.  My only complaint is the plastic handle is round, when your hands get a little sweaty, it can be difficult to keep it from twisting in the mortise as you drive it in.  Not a deal breaker though, I was able to make it work.  I suppose if it becomes a problem, I could reshape the handle for a better grip.

Legs with all mortises complete
I cut tenons on the stiles and rails for one end of the cabinet to see how it looked assembled, minus the panels.

Dry fit with rails and stile
I then cut tenons on the drawer rails.  These will be the attachment points for the drawer slides and I want them to be solid since the slides are rated for 100 pounds.  The drawers will be large and heavy, even when empty.  I will make them out of 1/2" thick birch with 1/2" Baltic birch plywood for the bottoms.  They will have an applied frame and panel front to match my kitchen cabinets.

End assembly shown from the outside
Still need to make the grooves for the panels in the legs and the stile.

End assembly shown from the inside
When the drawer rails are planed to final thickness they will be flush with the inside of the legs.

Next I'll be cutting the rest of the tenons for all these mortises.

To be continued...


Thursday, June 15, 2017

Kitchen island is underway

With my cut list in hand, I visited my local hardwood dealer and started selecting boards for the project.  I like using chalk to mark out which parts will be cut from each board and mark them off of my cut list as I go.  This works well to ensure that I make it home with enough lumber to actually build the project.  It's also handy when I get ready to break down the boards into components as the chalk map is still there to guide me.  I usually double check to see if rearranging things will lead to a more efficient use of material, in this case I couldn't really improve on my initial layout.

  I let the lumber sit in my shop for a little over a week before starting to break it down this week.  I sticker it so air can flow through the stack

Letting the lumber breath

I couldn't get 12/4 stock so I glued up 8/4 and 4/4 boards to get the thickness I needed for the leg blanks.

Three legs finished and one in clamps

I broke down all the boards into oversize parts and sticker staked them to continue to acclimate for a couple of days before additional milling.  I moved the long stock to the floor the next day so I could use my bench again.

Short parts

Long parts

I spent the afternoon laying out, cutting, and sanding corbels.  At the end of the day I had some respectable looking parts.  The small ones will hold a towel bar at the end of the island near the sink.

Pretty corbels all in a row
I'm having second thoughts about the size of the legs.  In my drawing, I made them 2-1/4" square to match the width of the stiles which looks pretty good on paper.  I'm considering upping them to 2-1/2" since this island will need to support quite a bit of weight in it's six large drawers.  If I had considered this a little sooner, I could have cut the long boards for the web frame a little wider to allow for the change.  Now I'll have to glue a piece onto them to add 1/4" of width.  The rails and panels will need to change too but they will end up being smaller.

to be continued ...


Tuesday, May 9, 2017

Summer project (hopefully)

I remodeled my kitchen a couple of years ago but never got around to building the island.  I put in a temporary island made from a 2x4 frame with a piece of particle board for the top and covered it with a plastic tablecloth.

Initially I planned for the island to be it 34-inches wide and 60-inches long.  I made the temporary island 72-inches long thinking if it were too big, I could just keep trimming it down until I found the best fit for the room.  It turns out that I didn't need to cut it down at all as it's a perfect size.  I can easily fit three stools along the front and one on the end.

The other hold up in this project was creating a drawing and deciding on the construction methods.  I finally got to work in Sketchup and have what I believe to be a good working solution.  I still need to add drawer runners to the drawing but the overall carcase is done.

It will be a painted Shaker style affair with a natural walnut top and six large drawers.  I had looked into buying a pre-made butcher block walnut top but there are a couple of drawbacks.  First, they're pretty expensive.  Second, I would likely have to special order it, meaning sight unseen.  Some of the tops I have seen online have a mixture of heartwood and sapwood and I'm just not sure I'd like that.  I'll probably end up building my own so I can pick the boards myself and get a consistent color.

Anyway, here's a rendered image of what I have so far.


Thursday, September 22, 2016

Winding sticks

After working for years without proper winding sticks, I finally broke down and built a set.  I had some padauk boards that I picked through to find one with some quartersawn grain that I could rip from one edge.  I also had some holly left over from the winding sticks I made for my niece a few years ago.


I more or less followed Paul Sellers design and build.  They are somewhat triangular in cross section with a holly button at the bottom center of each and holly inlays on the top edge of one.  The other one has a strip of walnut rabbeted along the top edge for contrast with the holly.  I wanted to use ebony but didn't have a piece long enough.  In hindsight, I wish I would have tried to ebonize the walnut since it isn't that much darker than the padauk.

I made these 18 inches long but I think 15 or 16 would have been better.  I used a 1:7 dovetail marker to layout the holly inlays and chopped out the waste with a chisel.


I glued everything in place with liquid hide glue.


Here they are in the white, looking good.


I finished them by wiping on a few coats of sealcoat shellac.  That turned out to be a mistake.  I had purposely avoided sanded these so I wouldn't contaminate the holly with dust from the darker padauk.  I wasn't able to get a good surface with a smoothing plane since there seemed to be reversing grain, so I used a card scraper to finish up.  Even though the scraper was making shavings it still left some dust which I failed to clean off well enough before shellac.  Long story longer, I ended up with pink holly and had to scrape the finish off of the inlays to try and remove it.  I got most of it but you can still see signs of it, especially in those end grain plugs.


They turned out OK but it chaps my backside that I was capable of better work and failed to produce it.

Lessons learned for the next set, I will make them shorter, ebonize the walnut, spray the shellac, and no scraping or sanding, handplanes all the way tear-out be damned.


Saturday, August 6, 2016

Small carcase saw

I have built a few back saws in the past couple of years.  I bought this kit thinking it would be my first.  It consisted of a toothed plate (not sharpened), a machined brass back, and two brass saw bolts with split nuts.  Before I put the kit to use, I figured out a way to make all the parts to build my own saws from scratch.  As a result, this kit sat unused for a few years.  I decided it was time to do something with it.  I had actually cut out and started shaping a black walnut tote for it way back when, so it would be a pretty easy build to finish.

I don't really care for a machined saw back since they are typically permanently attached to the plate with loctite or epoxy.  I used a plastic dead blow mallet to pinch the slot partially closed so that I could treat it like a folded back when installing the plate.  This took some time and a little care but worked out perfectly.  If the plate ever becomes damaged, I can remove it and reuse the brass back or, if the saw is ever dropped causing the tooth line to becomes wavy, I can remove and reinstall the plate to fix it.

Saw kit after cutting everything to size and punching the holes.


Before cleaning the plate and punching the holes.

The plate was 12 x 2-7/8 x .020 inches.  The finished plate ended up 11-3/4 inches long after a minor mistake cutting the bevel where the handle would fit.  There is 2-5/8 inches of usable plate under the back.  It is 14 PPI and I filed it crosscut with 15 degrees of rake and 20 degrees of fleam.

Flush bolt heads.

The heads of the bolts had a ridge around the outside leaving a relived center about .030 inches deep.  I didn't like this so I put them in the lathe and turned the ridge off making the bolt heads flat.

Clocked split nuts.

I initially set the teeth using a nail set and hammer.  I put the plate on a sacrificial backer board and gave every other tooth a light tap or two, flipped it over and did the remaining teeth.  The board I used had a dent under one of the teeth.  Consequently, when I struck that tooth with nothing to support it, it broke off.  Not the end of the world but next time I'll pick out a better board.  This put a little more set in the teeth that I wanted so I moved to the anvil on the back of my vise and lightly tapped the entire tooth line down both sides to reduce the set.

I made some test cuts to see how the saw tracked.  It pulled a little to one side so I ran a diamond hone down that side of the teeth and tried another cut.  With some trial and error I got it to cut pretty straight.  The cuts were nice and clean but there was some binding in the kerf which annoyed me.  I fought this for a while then decided I just didn't have enough set.  This time I used a plier type saw set which normally over sets the teeth but I used a very light touch with it and got acceptable results.  The overall kerf is a little bigger than I would like but the saw tracks straight and doesn't bind.  Now the saw cuts fast and leaves a fairly smooth finish.


Completed saw.

Overall, I'm very happy with the results.  This will become a go to tool in my shop.


Sunday, July 31, 2016

Saw and plane till


I used to store my handsaws on pegboard hooks with multiple saws stacked on top of each other to save space.  You know where this is headed, the saw I needed was always at the back of the stack.  I was getting tired of this and wanted a saw till but didn't feel I had the available wall space.  Most of my shop has pegboard on the upper half of the walls with lots of hooks holding lots of crap.  After looking at the space above my tool chest, I decided that I didn't need a lot of this crap, so maybe I did have the wall space for a till.

I saw an article in the August 2016 edition of Popular Woodworking magazine that started this whole reorganization project.  The link to the online portion of that article and the Sketchup drawing are at the bottom of this post.  I liked this design better than any I had seen before and it would also hold my bench planes.  Not only is it convenient storage but it looks cool when someone walks into the shop.

My recently cleaned off pegboard wall (forgot to take a before pic).

The case construction is pretty straight forward.  Through dovetails, dados, glue, nails, screws, etc.  I sprayed on two coats of Sealcoat shellac followed by two coats of satin lacquer.  I'm not a big fan of shiny. 

Dry fit of the components.

Dovetails and upper cleat detail.

Mounted with six #12 flat head screws into the studs.

I stacked some scrap boards on top of my machinist chest to rest the till on while I marked for the holes and screwed it to the wall.  It wasn't terribly heavy but it was too much to hold steady with one hand while trying to mount it.  With two people, it would have been easy enough.

Showtime!

I would have liked to have had the drawers in the original design but I needed enough space below the till to open the top on my machinist chest.  With the open back, I was able to utilize the pegboard to hang my saw vise and saw sets above the saws within the cabinet so that was a bonus.


The divider in the saw till can be moved if I need to adjust left or right to allow for a changing saw collection.  Of course I would have to take it off of the wall to remove the two screws that hold it in place.  For now, I have plenty of room to expand on my saw addiction.  I also have a place to store my recently built marking gauges which have been all over the shop waiting for a home.


I now have a permanent home for my small collection of molding planes and my plough plane.  The plane till dividers are customized for my collection of bench planes.  The empty spot above the shoulder plane is for a traditional wooden smoother.  It felt a little top heavy and I was afraid it wouldn't take much of a bump to knock it out of the till.  I'll need to add a taller cleat to make sure it stays securely in place. 

I used hand tools for all of the case joinery.  I did use my drill press to bore the holes for the closet rods and my impact driver to install the screws.  I also used a brad nailer to secure the saw divider at each end.  It was only four nails, so I could have pre-drilled and driven them by hand but I didn't have the right size nails on hand.  Overall, it was a really fun project.  


Sketchup model